
NEXTWOOD Installation Guide
Representative WPC Installation Methods
Decking and fencing systems use a similar logic: prepare the base, align the structure, fasten the hardware, leave expansion space and finish with trims or caps.
Representative methods for multiple product families
Confirm final spacing, fasteners, accessories and drawings against the selected NEXTWOOD profile and actual site conditions.
Project Material Calculators
Open NEXTWOOD project calculators for preliminary decking-board, joist, clip, fence-board, post and rail estimates before quotation.
Shared installation principles
Confirm the base
Work from a solid, level and load-bearing surface before setting joists, posts or bases.
Control drainage
Keep the structure slightly sloped or ventilated so water can move away from buildings and profiles.
Use system hardware
Install with the supplied clips, screws, rails, post bases and caps for a clean finished system.
Leave movement gaps
Allow expansion gaps around walls, board ends and fixed elements according to the project drawing.
Decking method
Clip-fixed WPC decking
A typical NEXTWOOD decking installation uses joists, start clips, plastic clips and edge trims to lock boards in place without visible face screws.
- Solid hard surface with slight fall for water drainage
- Joists fixed at the required spacing
- Start clips and plastic clips lock boards without face screws
- Edge trims close the perimeter after final alignment
Confirm substrate condition, joist spacing, board direction, expansion gaps and edge trims before installation.
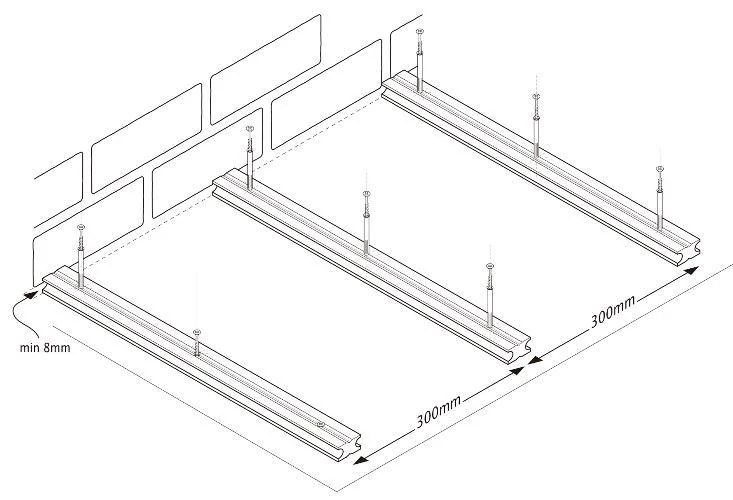 Step 01
Plan and fix joists
Measure the site, confirm board direction and anchor joists to a solid base at the required spacing.
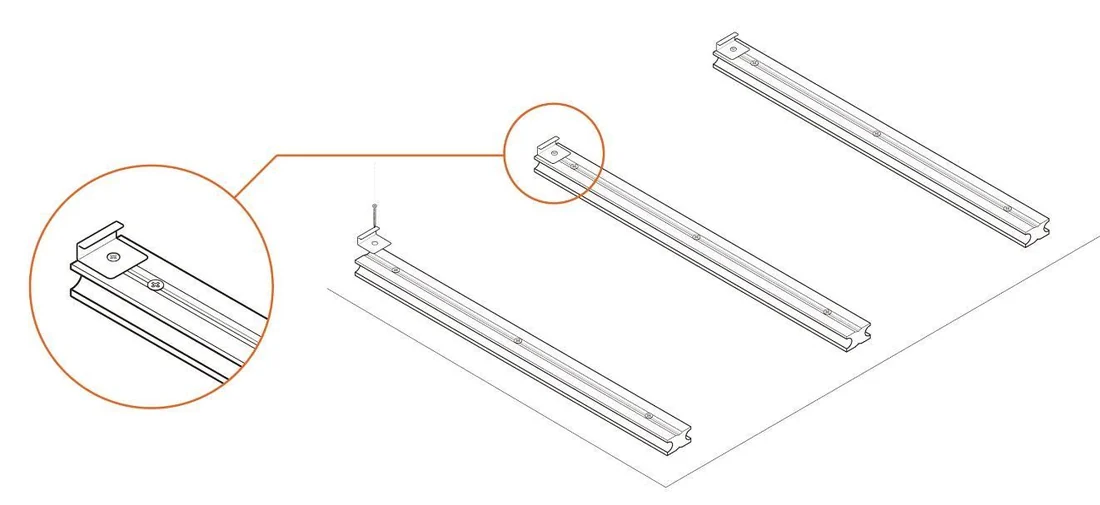 Step 02
Set start clips
Fix start or stop clips at the starting line so the first board sits straight and secure.
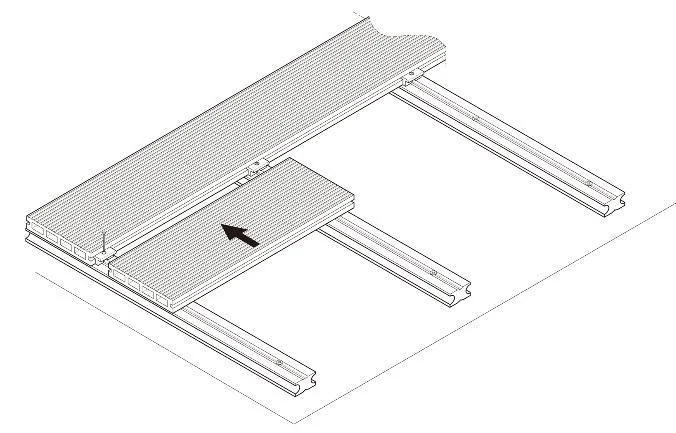 Step 03
Lock the first board
Slide the first board into the clips and lightly secure the opposite edge for adjustment.
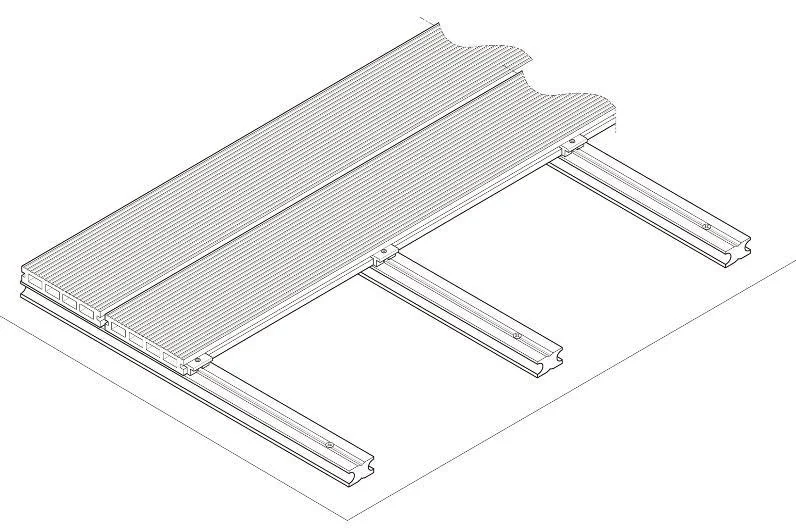 Step 04
Continue with clips
Use plastic clips and stainless screws between boards, keeping the layout aligned as the field expands.
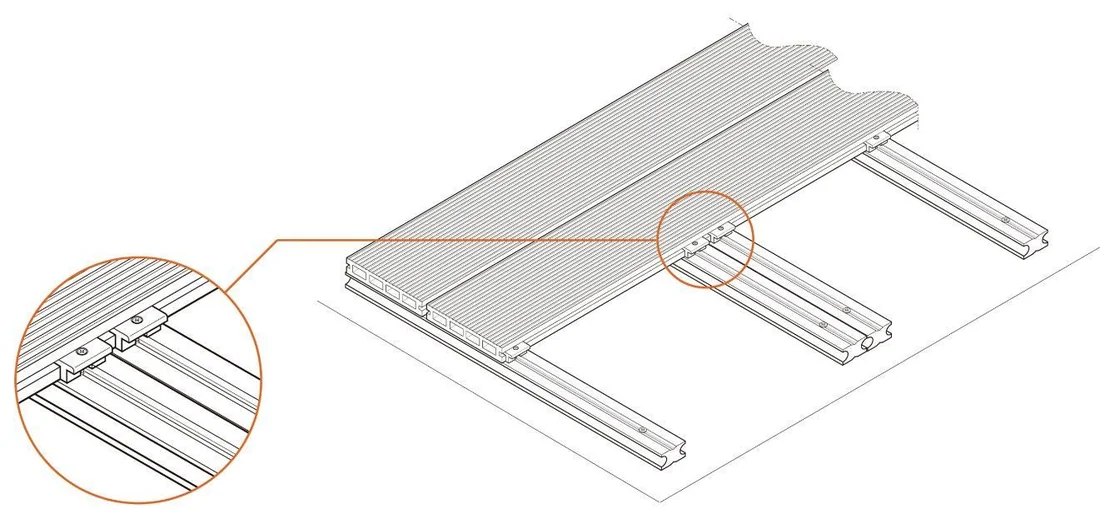 Step 05
Support board joints
Use double joists under end-to-end board joins and keep the specified thermal expansion gap.
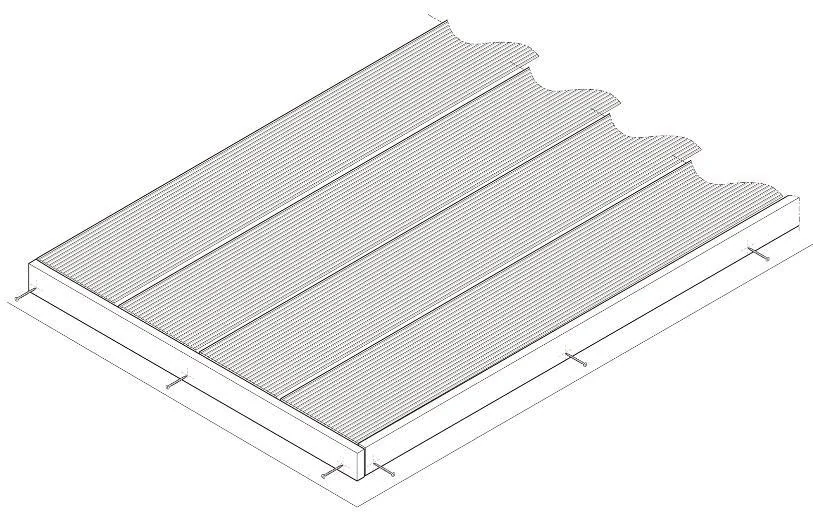 Step 06
Finish the edges
After all boards are aligned, tighten clips and install edge trims for a clean perimeter.
Fencing method
Post-and-panel WPC fencing
A typical NEXTWOOD fencing installation sets posts first, then places rails and slides boards between the posts before closing the top with caps.
- Post locations control the whole fence alignment
- Bottom rails and board stacks slide between the posts
- Top rails and caps close the system after panels are seated
- The method represents common privacy-fence assemblies
Confirm post centers, base fixing, rail direction, panel height and cap details before installation.
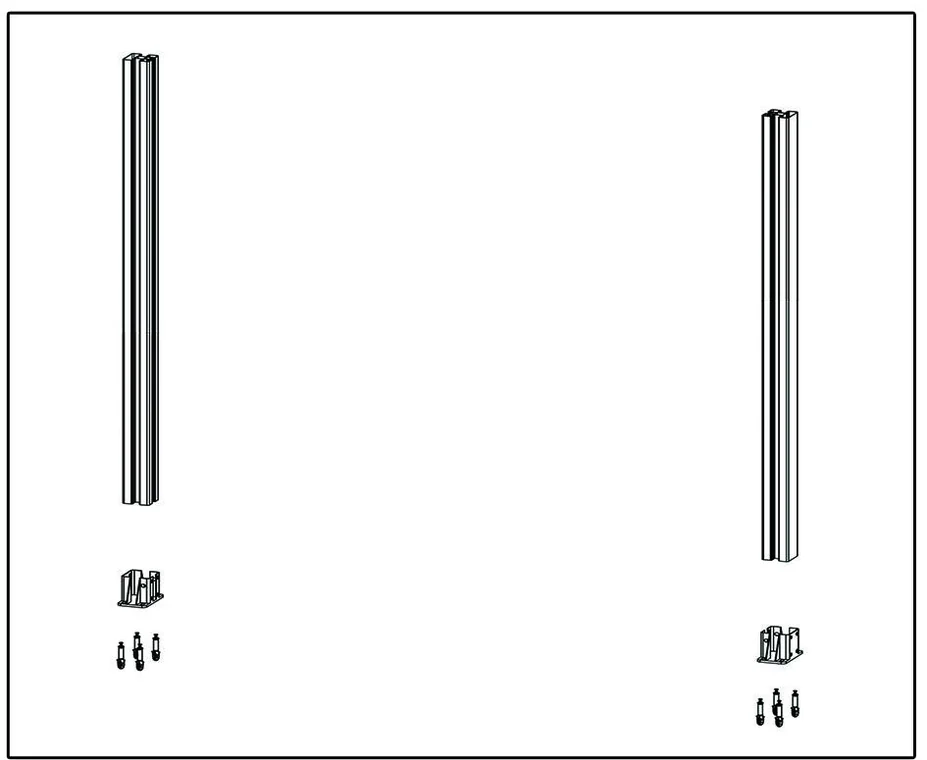 Step 01
Lay out components
Check posts, bases, screws, rails, boards and caps against the exploded view before assembly.
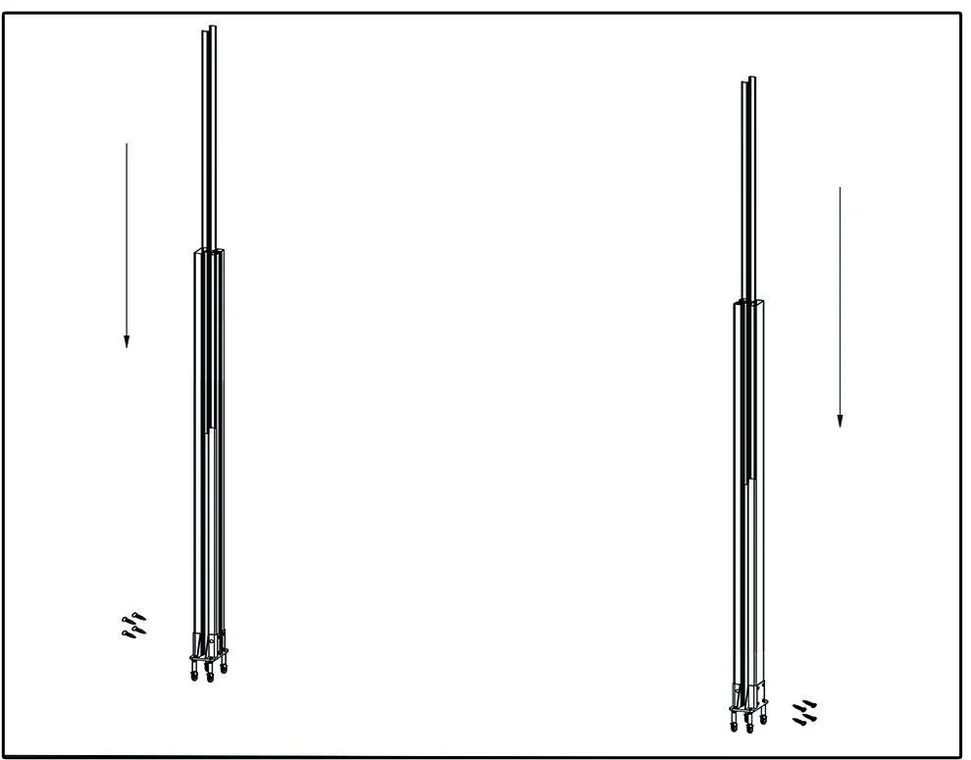 Step 02
Secure the posts
Fix the post bases and set the posts firmly, keeping the center distance and vertical alignment accurate.
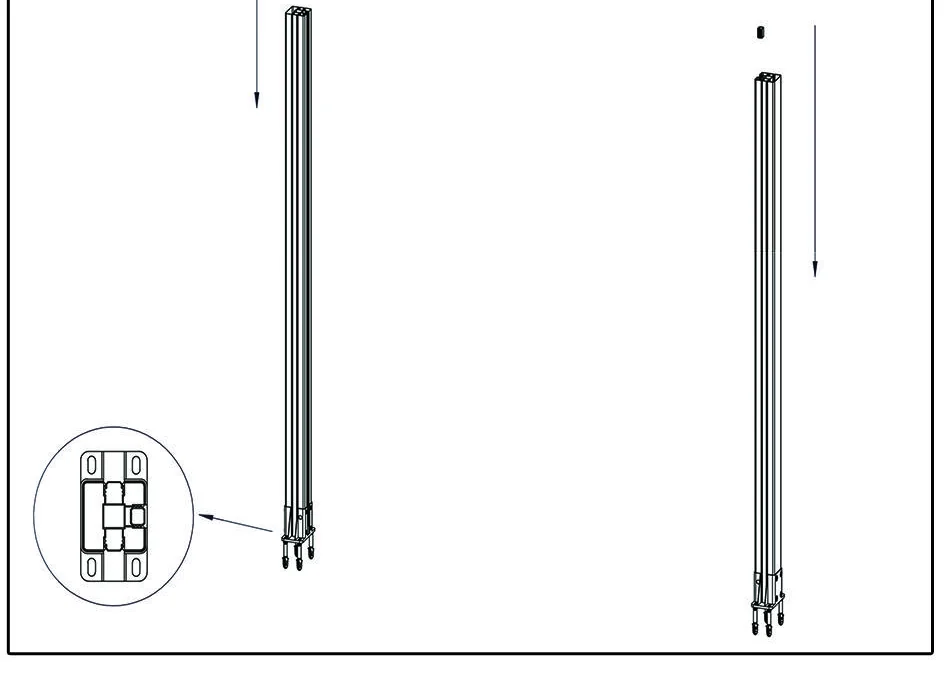 Step 03
Insert bottom connectors
Install the lower connection pieces or bottom profiles at the base of the posts as shown in the system drawing.
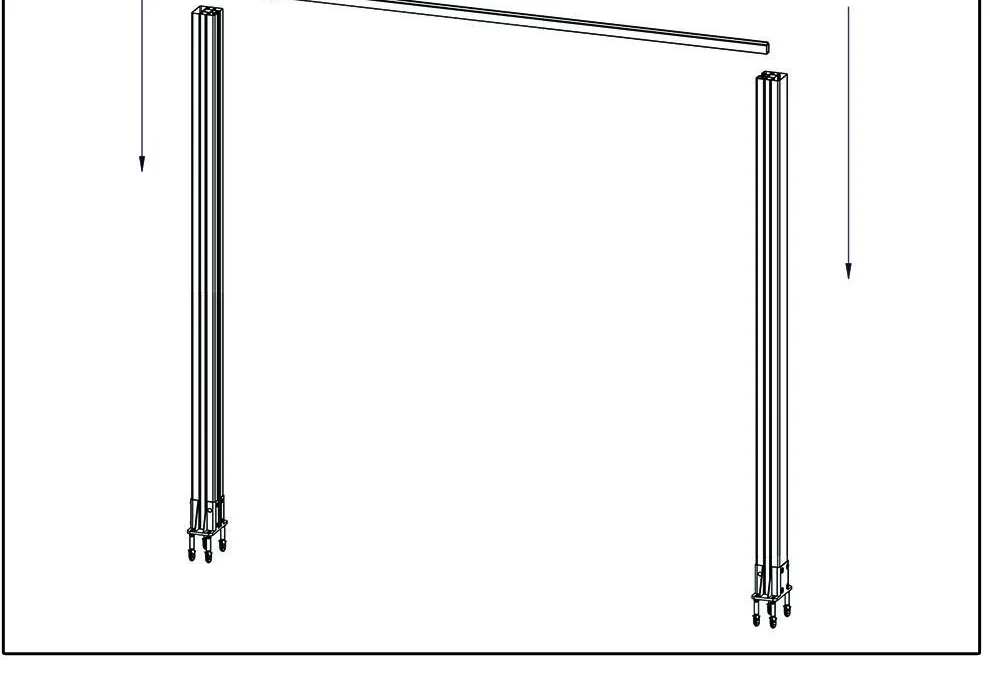 Step 04
Place bottom rails
Set the lower rail between posts to form the channel that supports the fence boards.
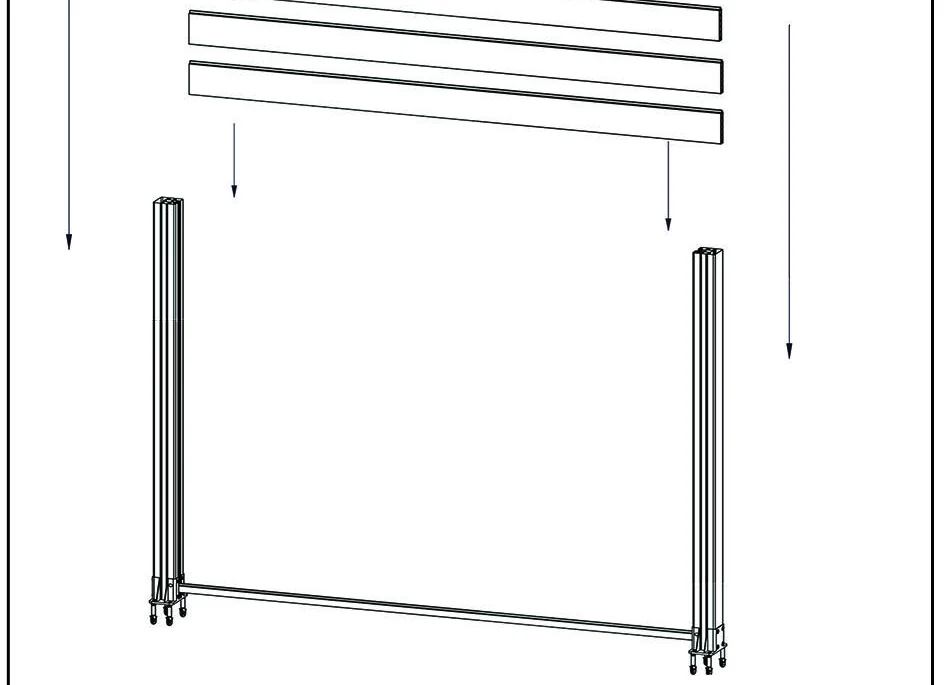 Step 05
Stack fence boards
Slide fence boards into the post channels and repeat until the panel height is reached.
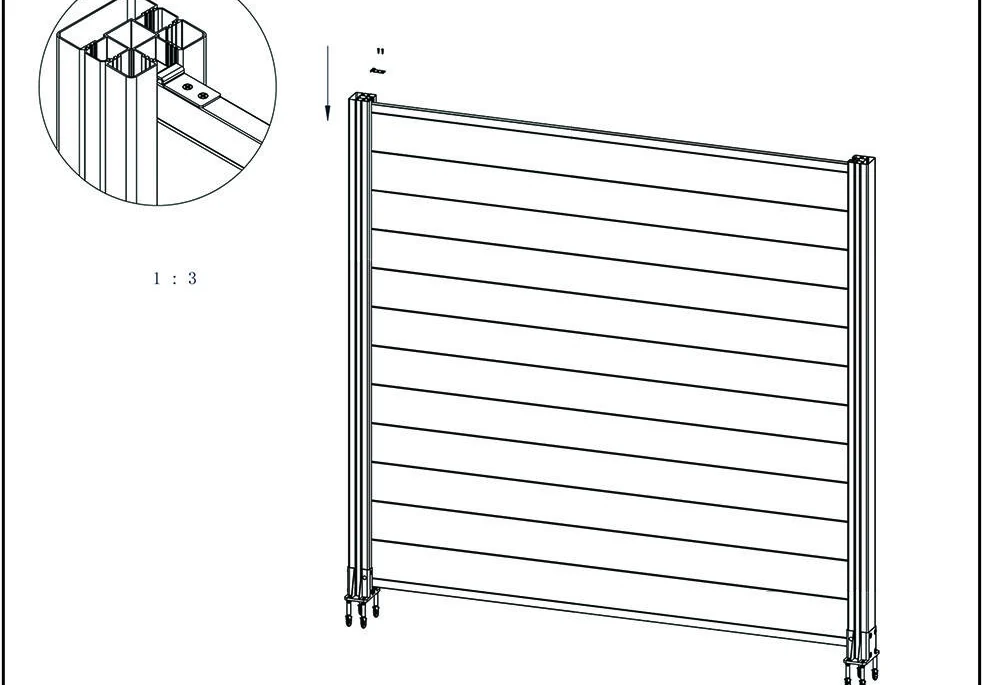 Step 06
Fasten top rail and caps
Cover the top rail, fasten it to the posts and close the post caps for a finished panel.
Important installation notes
Need project-specific guidance?
Send the product profile, quantity, site photos or drawings to NEXTWOOD. Our team can help confirm spacing, accessory lists and installation notes before work begins.
Let's Start Your Project
Ready to transform your outdoor space? Get in touch with our team for product inquiries, samples or technical support.
Send us a message
Contact Information
Request Free Samples
Want to see and feel our products? Samples are free. International courier fees are paid by the requester.
Request Samples